

Table of Contents
- What Does Gaming Quality Actually Mean?
- Step 1: Check Your System Requirements vs. Actual Performance
- Step 2: How to Stress Test Gaming PC Stability
- Step 3: Run PC Gaming Performance Benchmarks
- Step 4: Check Monitor Resolution and Refresh Rate Settings
- Step 5: Gaming Hardware Bottleneck Check
- Separating Subjective Quality from Objective Metrics
- Tools and Gear to Improve Your Verified Gaming Setup
- Frequently Asked Questions
Last Updated: September 4, 2026
What Does Gaming Quality Actually Mean?
Most people confuse "gaming quality" with how a game looks. In reality, gaming quality is a combination of measurable performance, visual fidelity, and how the experience feels to you. To verify gaming quality, you need to separate what your hardware objectively delivers from what your eyes and reflexes subjectively perceive.
This guide from The Techie Den breaks down the exact steps to verify gaming quality on your own rig. We will show you how to move past vague impressions and use concrete tools, settings, and metrics to confirm that your system is running the way it should. Below, we'll cover system requirements, stress testing, benchmarking, display settings, and bottleneck checks.
The core tension in gaming is that your PC can render a scene perfectly, but if your monitor isn't displaying it or your network is dropping packets, the experience still feels broken. Verifying quality means checking the entire chain, not just the GPU.
Step 1: Check Your System Requirements vs. Actual Performance
The first step to verify gaming quality is comparing the game's official system requirements against your actual hardware specifications. Open your system information panel and note your CPU model, GPU model, and total RAM. Then, check the game's store page for its minimum and recommended requirements.
A common mistake is only checking if you meet the minimum specs. Meeting the minimum usually means you will run the game at low settings with low frame rates. The recommended specs are your real target for a smooth experience. You should also verify that your GPU drivers are up to date, as driver updates often include day-one optimizations for new game releases.
Step 2: How to Stress Test Gaming PC Stability
Stress testing is the process of pushing your hardware to its maximum load to confirm it remains stable under pressure. To verify gaming quality, you need to ensure your system does not crash or overheat during intense gameplay sessions.
To stress test your gaming PC, follow these steps:
- Download a dedicated stress testing tool like FurMark for the GPU or Prime95 for the CPU.
- Run the stress test for 30 to 60 minutes while monitoring your hardware temperatures.
- Watch for error messages, screen freezes, or unexpected system reboots.
- Monitor your CPU use and VRAM usage to see if any component hits 100% capacity.
- Check your temperatures against the manufacturer's maximum rated limits.
If your system crashes during a stress test, it is unstable. This instability is often caused by aggressive overclocking, insufficient power supply, or inadequate cooling. Fixing these issues before you play is the only way to ensure a stable, high-quality gaming session.
Step 3: Run PC Gaming Performance Benchmarks
PC gaming performance benchmarks are standardized tests that measure how well your hardware runs specific games or workloads. To verify gaming quality, you should run built-in game benchmarks or third-party tools to get concrete frame rate data.
Start with the game's own benchmark mode, which is usually found in the settings menu. These tests replay a scripted scene and report your average frame rate, minimum frame rate, and sometimes your frame time. Frame time is critical because it measures the time between frames; high frame times cause stutter even when the average FPS looks acceptable.
For a more technical analysis, tools like CapFrameX or PresentMon can log your frame rate and frame time in real time. The goal is to have a smooth line on your frame time graph. Spikes in frame time indicate stutter, which degrades perceived quality more than a low average FPS does.
Step 4: Check Monitor Resolution and Refresh Rate Settings
Your monitor's resolution and refresh rate determine how the final image is displayed. To verify gaming quality, you must confirm that your display settings match your hardware's output. A powerful GPU is wasted if your monitor is capped at 60Hz while your system can push 144 frames per second.
Navigate to your display settings in Windows and confirm the resolution is set to the monitor's native resolution. Then, verify the refresh rate is set to the highest available option, such as 144Hz or 240Hz. If you are using an HDMI or DisplayPort cable, ensure it supports the bandwidth required for your resolution and refresh rate.
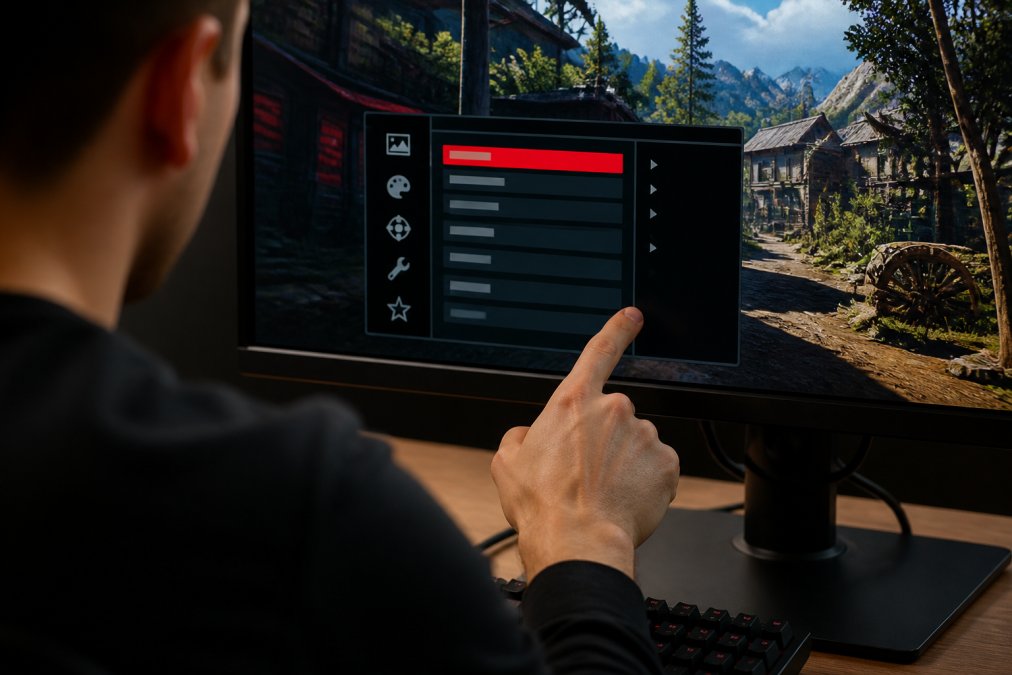
You should also enable the monitor's on-screen display (OSD) to check the active signal. The OSD will show you the incoming resolution and refresh rate, confirming that the monitor is receiving the full signal from your GPU rather than a downscaled version. Enabling V-Sync can eliminate screen tearing, but it introduces input lag, so only use it if tearing bothers you more than latency.
Step 5: Gaming Hardware Bottleneck Check
A hardware bottleneck occurs when one component limits the performance of the rest of the system. To verify gaming quality, you need to identify which component is holding your frame rate back. The most common bottleneck is the CPU being unable to keep up with the GPU, or vice versa.
To perform a gaming hardware bottleneck check, run a game while monitoring your CPU use and GPU use simultaneously. If your GPU is at 99% use but your CPU is only at 60%, the GPU is working as hard as it can, and your frame rate is likely optimal. However, if your CPU is at 99% while the GPU sits at 70%, your CPU is the bottleneck.
| Bottleneck Type | Symptom | Typical Fix |
|---|---|---|
| CPU Bottleneck | High CPU use, low GPU use | Lower CPU-heavy settings like draw distance or physics |
| GPU Bottleneck | High GPU use, low CPU use | Lower resolution or graphics quality settings |
| RAM Bottleneck | Low FPS with high RAM usage | Close background apps or add more RAM |
| Thermal Throttling | FPS drops after 20-30 minutes of play | Improve case airflow or clean dust from fans |
Separating Subjective Quality from Objective Metrics
Objective metrics like frame rate and resolution tell you what the hardware is doing, but they do not tell you how the game looks to you. Subjective quality is how the image appears on your screen, influenced by your monitor's calibration, your distance from the screen, and your personal sensitivity to motion blur and input lag.
Many guides ignore this distinction, but it is central to verifying gaming quality. You can have perfect benchmark scores and still feel that a game looks "off." This is often due to incorrect display settings. For example, motion blur and anti-aliasing can smooth movement but also create a "smeary" look that some players dislike. Texture filtering and anti-aliasing improve image sharpness but cost performance.
The best approach is to test your settings in practice. Play a game for 30 minutes, then disable motion blur and play again. Compare how the game feels, not just how it looks. Your comfort and reaction time are valid quality metrics that no benchmark can measure.
Tools and Gear to Improve Your Verified Gaming Setup
Once you have verified your system's performance, the right peripherals ensure that your hardware's output reaches you without added lag. High-quality gear can reduce input lag and make your verified settings feel responsive.
At The Techie Den, we stock equipment designed to close the gap between your PC's output and your actions. For instance, the Mchose A7 V2 Pro Ultra tri-mode wireless gaming mouse offers a high-DPI sensor and tri-mode connectivity, ensuring precise tracking and a stable connection whether you play wirelessly or wired. Its lightweight design reduces fatigue during long sessions where you are monitoring performance.
Similarly, adapters like the Haute42 Cosmox Booter X wireless adapter can eliminate cable clutter and provide a low-latency wireless link for your controller. If you are transitioning from a PC setup to a console, the Intel N100 Game PC Box offers a pre-configured retro gaming solution with over 52,000 games, letting you skip the hardware diagnostics entirely and just play.
Frequently Asked Questions
How do I check if my PC is performing at its best for gaming?
To verify gaming quality, start by running a benchmark tool like 3DMark or Unigine Heaven. Compare your results against systems with similar specs. Then, monitor your frame rate in-game using an FPS counter. Finally, check your CPU and GPU utilization with Task Manager or MSI Afterburner to spot any obvious bottlenecks.
What is the difference between frame rate and gaming quality?
Frame rate (FPS) is the number of frames your graphics card renders each second, directly impacting smoothness. Gaming quality is a broader concept that includes resolution, graphical details, and visual fidelity. High frame rates make motion fluid, while high quality makes the image detailed. To verify gaming quality, you must assess both: a game can run at 120 FPS but still look poor if the resolution and detail settings are low.
How can I verify my monitor's resolution and refresh rate settings?
Right-click your desktop and select Display Settings. Scroll to Advanced Display to confirm the resolution matches your monitor's native spec. The refresh rate is listed below the resolution. If it shows 60Hz but you own a 144Hz monitor, use the drop-down menu to select the higher rate. You can also use the monitor's on-screen display (OSD) to confirm the active signal.
How do I know if my hardware is bottlenecking my gaming performance?
Run a gaming hardware bottleneck check by monitoring CPU and GPU utilization during gameplay. If your GPU is at 99% utilization while your CPU sits at 50%, your GPU is the limiting factor, which is normal. If the CPU is maxed out and the GPU is under 90%, your processor is the bottleneck. Lower in-game resolution to see if frame rates jump; if they do, the CPU is struggling to keep up.
Verifying your gaming setup takes time, but the payoff is a smooth, responsive experience that matches your hardware's potential. The challenge is that finding the right peripherals to complete your setup can be just as important as the diagnostics. The Techie Den offers a curated selection of high-performance gaming mice, wireless adapters, and complete gaming consoles to help you act on your verified settings. Get started with The Techie Den and complete your optimized gaming rig today.
This article was written using GrandRanker


